There is no doubt that we all want our applications to load very fast. To do this, we need to keep the initial bundle size small. Lazy loading is one of the methods we use in this case. We can lazy load some third-party JavaScript files and some CSS files. In this article, we will learn how to lazy load our CSS files and how to extract them with a hash on production build to prevent browser cache.
While developing ABP Commercial, we were able to load CSS files lazy, but we could not extract these CSS files to the build output with a hash. During my research, I encountered this issue and saw that the name of a CSS file that is loaded lazily cannot be hashed. The names of CSS files may not be hashed, but the names of JavaScript files can be hashed. I achieved my goal by importing JavaScript files instead of CSS files.

Let's see how this work can be done with an application that can switch between Bootswatch themes.
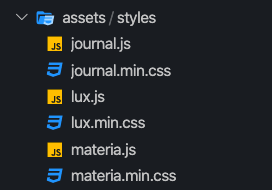
I downloaded the minified CSS files of Materia, Journal, and Lux themes and copied them to the src/assets/styles folder. Then I created JavaScript files corresponding to each CSS file.

assets/styles
The content of {theme-name}.js:
import css from "./{theme-name}.min.css";

export default css;
The related CSS file has imported and exported as default in each of JavaScript files.
Let's see how to load these JavaScript files in our application.
We'll create a service and load themes via this service. A service called SwitchThemeService can be generated with the following command:
ng generate service switch-theme/switch-theme
Replace the SwitchThemeService content with below:
import { Injectable } from '@angular/core';

@Injectable({
  providedIn: 'root',
})
export class SwitchThemeService {
  selectedTheme = 'materia';
  insertedElement: HTMLElement;

  constructor() {
    this.loadTheme();
  }

  loadTheme() {
    import(
      /* webpackChunkName: "[request]" */
      `../../assets/styles/${this.selectedTheme}.js`
    )
      .then((s) => s.default)
      .then(this.insertToDom);
  }

  insertToDom = (content: string) => {
    const element = document.createElement('style');
    element.textContent = content;
    document.head.appendChild(element);

    if (this.insertedElement) this.insertedElement.remove();
    this.insertedElement = element;
  };
}
What we did above:
- Defined the
selectedThemevariable with initial value that ismateria. - Defined the
insertedElementvariable to keep inserted DOM element. - Defined the
loadThememethod for lazy loading the Javascript files inassets/stylesfolder. The import function of the Webpack loads the JavaScript modules dynamically and returns the result as a promise. Thedefaultproperty of theimportfunction result gets us the CSS raw content. Handled the content in theloadThememethod and pass it to theinsertDommethod. - Called the
loadThememethod in constructor to load initial theme on application initialization.
Webpack includes JavaScript files which are passed to the import function to the build output. In the comment block above, we have specified the chunk names with a magic comment that is webpackChunkName. See the Magic Comments on Webpack documentation.
We will create a component to change the theme on the fly. A component named SwitchThemeComponent can be generated with the following command:
ng generate component switch-theme --inlineTemplate
Replace the SwitchThemeComponent content with the below:
import { Component, OnInit } from '@angular/core';
import { SwitchThemeService } from './switch-theme.service';

@Component({
  selector: 'app-switch-theme',
  template: `
    <select [(ngModel)]="service.selectedTheme" (ngModelChange)="service.loadTheme()">
      <option [ngValue]="'materia'">Materia</option>
      <option [ngValue]="'journal'">Journal</option>
      <option [ngValue]="'lux'">Lux</option>
    </select>
  `,
})
export class SwitchThemeComponent {
  constructor(public service: SwitchThemeService) {}
}
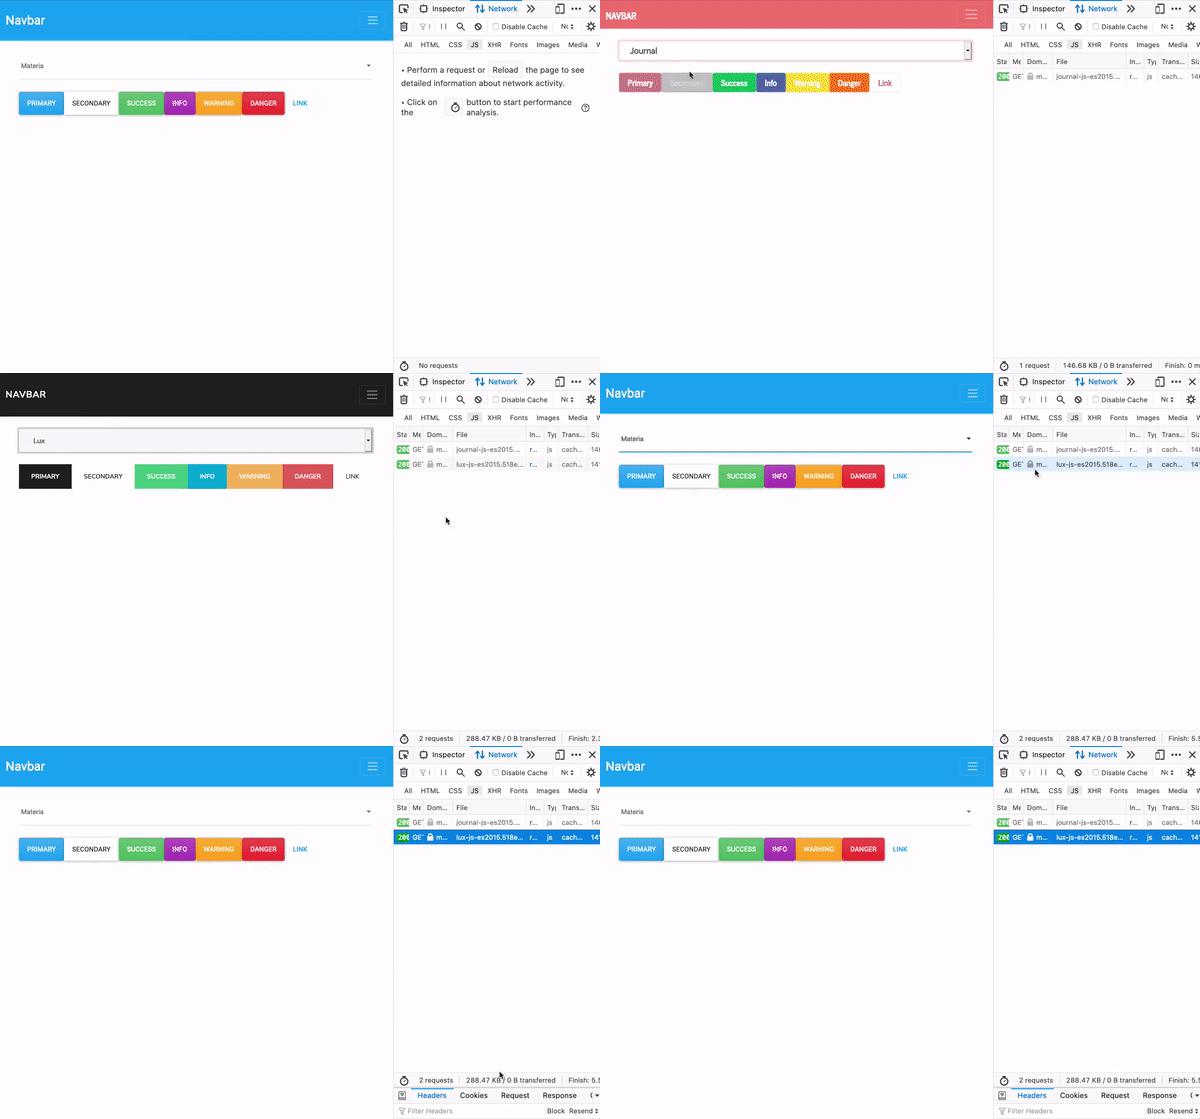
Switching between themes is done with the select element using SwitchThemeService in the component.
Take a look at how it works:

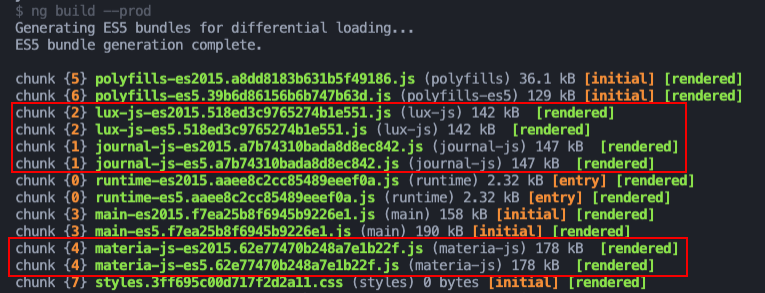
See the generated chunks and hashed chunk names on production build:

See the live demo and the source code on GitHub.
Follow me on Twitter and GitHub.
Thanks for reading. Please share your thoughts on this article in the comment section below.😊
