Introduction
This step-by-step article describes how to upload a file to a Web server and also download by client with using ASP.NET Core & ABP Framework. By following this article, you will create a web project and its related code to upload and download files.
Before the creating application, we need to know some fundamentals.
BLOB Storing
It is typical to store file contents in an application and read these file contents on need. Not only files, but you may also need to save various types of large binary objects, a.k.a. BLOBs, into a storage. For example, you may want to save user profile pictures.
A BLOB is a typically byte array. There are various places to store a BLOB item; storing in the local file system, in a shared database or on the Azure BLOB storage can be options.
The ABP Framework provides an abstraction to work with BLOBs and provides some pre-built storage providers that you can easily integrate to. Having such an abstraction has some benefits;
- You can easily integrate to your favorite BLOB storage provides with a few lines of configuration.
- You can then easily change your BLOB storage without changing your application code.
- If you want to create reusable application modules, you don't need to make assumption about how the BLOBs are stored.
ABP BLOB Storage system is also compatible to other ABP Framework features like multi-tenancy.
To get more information about ABP BLOB Storing system, please check this documentation.
Preparing the Project
Startup template and the initial run
Abp Framework offers startup templates to get into the business faster. We can download a new startup template using Abp CLI:
abp new FileActionsDemo -m none
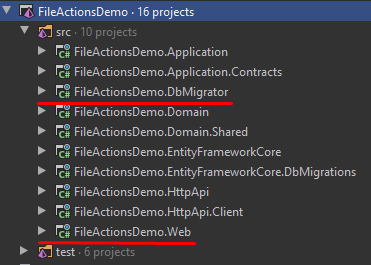
After the download is finished, we run FileActionsDemo.DbMigrator project to create the database and seed initial data (admin user, role, etc). Then we run FileActionsDemo.Web to see our application working.
Default admin username is admin and password is 1q2w3E*
Adding Blob Storing Module
For this article, we use Blob Storing Database Provider.
You can use Azure or File System providers also.
Open a command prompt (terminal) in the folder containing your solution (.sln) file and run the following command:
abp add-module Volo.Abp.BlobStoring.Database
This action will add the module depencies and also module migration. After this action, run FileActionsDemo.DbMigrator to update the database.
Setting up Blob Storaging
BLOB Strorage system works with Containers. Before the using blob storage, we need to create our blob container.
Create a class that name MyFileContainer at the FileActionsDemo.Domain project.
using Volo.Abp.BlobStoring;

namespace FileActionsDemo
{
    [BlobContainerName("my-file-container")]
    public class MyFileContainer
    {

    }
}
That's all, we can start to use BLOB storing in our application.
Creating Application Layer
Before the creating Application Service, we need to create some DTOs that used by Application Service.
Create following DTOs in FileActionsDemo.Application.Contracts project.
BlobDto.csnamespace FileActionsDemo { public class BlobDto { public byte[] Content { get; set; } public string Name { get; set; } } }GetBlobRequestDto.csusing System.ComponentModel.DataAnnotations; namespace FileActionsDemo { public class GetBlobRequestDto { [Required] public string Name { get; set; } } }SaveBlobInputDto.csusing System.ComponentModel.DataAnnotations; namespace FileActionsDemo { public class SaveBlobInputDto { public byte[] Content { get; set; } [Required] public string Name { get; set; } } }
Create IFileAppService.cs interface at the same place with DTOs.
IFileAppServiceusing System.Threading.Tasks; using Volo.Abp.Application.Services; namespace FileActionsDemo { public interface IFileAppService : IApplicationService { Task SaveBlobAsync(SaveBlobInputDto input); Task<BlobDto> GetBlobAsync(GetBlobRequestDto input); } }
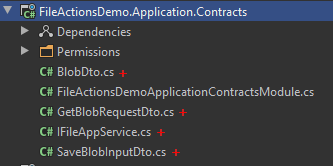
After creating DTOs and interface, FileActionsDemo.Application.Contracts project should be like as following image.
Then we can create our Application Service.
Create FileAppService.cs in FileActionsDemo.Application project.
using System.Threading.Tasks;
using Volo.Abp.Application.Services;
using Volo.Abp.BlobStoring;

namespace FileActionsDemo
{
    public class FileAppService : ApplicationService, IFileAppService
    {
        private readonly IBlobContainer<MyFileContainer> _fileContainer;

        public FileAppService(IBlobContainer<MyFileContainer> fileContainer)
        {
            _fileContainer = fileContainer;
        }

        public async Task SaveBlobAsync(SaveBlobInputDto input)
        {
            await _fileContainer.SaveAsync(input.Name, input.Content, true);
        }

        public async Task<BlobDto> GetBlobAsync(GetBlobRequestDto input)
        {
            var blob = await _fileContainer.GetAllBytesAsync(input.Name);

            return new BlobDto
            {
                Name = input.Name,
                Content = blob
            };
        }
    }
}
As you see in previous code block, we inject IBlobContainer<MyFileContainer> to our app service. It will handle all blob actions for us.
SaveBlobAsyncmethod usesSaveAsyncofIBlobContainer<MyFileContainer>to save the given blob to storage, this is a simple example so we don't check is there any file exist with same name. We sent blob name, blob content andtrueforoverrideExistingparameter.GetBlobAsyncmethod is usesGetAllBytesAsyncofIBlobContainer<MyFileContainer>to get blob content by name.
We finished the application layer for this project. After that we will create a Controller for API and Razor Page for UI.
Creating Controller
Create FileController.cs in your FileActionsDemo.HttpApi project.
using System.Threading.Tasks;
using Microsoft.AspNetCore.Mvc;
using Volo.Abp.AspNetCore.Mvc;

namespace FileActionsDemo
{
    public class FileController : AbpController
    {
        private readonly IFileAppService _fileAppService;

        public FileController(IFileAppService fileAppService)
        {
            _fileAppService = fileAppService;
        }

        [HttpGet]
        [Route("download/{fileName}")]
        public async Task<IActionResult> DownloadAsync(string fileName)
        {
            var fileDto = await _fileAppService.GetBlobAsync(new GetBlobRequestDto{ Name = fileName });

            return File(fileDto.Content, "application/octet-stream", fileDto.Name);
        }
    }
}
As you see, FileController injects IFileAppService that we defined before. This controller has only one endpoint.
DownloadAsync is using to send file from server to client.
This endpoint is requires only a string parameter, then we use that parameter to get stored blob. If blob is exist, we return a File result so download process can start.
Creating User Interface
We will create only one page to prove download and upload actions are working.
Create folder that name Files in your Pages folder at FileActionsDemo.Web project.
Create a Razor page that name Index with its model.
Index.cshtml.cs
using System.ComponentModel.DataAnnotations;
using System.IO;
using System.Threading.Tasks;
using Microsoft.AspNetCore.Http;
using Microsoft.AspNetCore.Mvc;
using Volo.Abp.AspNetCore.Mvc.UI.RazorPages;

namespace FileActionsDemo.Web.Pages.Files
{
    public class Index : AbpPageModel
    {
        [BindProperty]
        public UploadFileDto UploadFileDto { get; set; }

        private readonly IFileAppService _fileAppService;

        public bool Uploaded { get; set; } = false;

        public Index(IFileAppService fileAppService)
        {
            _fileAppService = fileAppService;
        }

        public void OnGet()
        {

        }

        public async Task<IActionResult> OnPostAsync()
        {
            using (var memoryStream = new MemoryStream())
            {
                await UploadFileDto.File.CopyToAsync(memoryStream);

                await _fileAppService.SaveBlobAsync(
                    new SaveBlobInputDto
                    {
                        Name = UploadFileDto.Name,
                        Content = memoryStream.ToArray()
                    }
                );
            }

            return Page();
        }
    }

    public class UploadFileDto
    {
        [Required]
        [Display(Name = "File")]
        public IFormFile File { get; set; }

        [Required]
        [Display(Name = "Filename")]
        public string Name { get; set; }
    }
}
As you see, we use UploadFileDto as a BindProperty and we inject IFileAppService to upload files.
The UploadFileDto is requires a string parameter for using as a blob name and a IFormFile that sent by user.
At the post action (OnPostAsync), if everything is well, we use MemoryStream to get all bytes from file content.
Then we save file with SaveBlobAsync method of IFileAppService.
Index.cshtml
@page
@model FileActionsDemo.Web.Pages.Files.Index

@section scripts{
    <abp-script src="/Pages/Files/index.js" />
}

<abp-card>
    <abp-card-header>
        <h3>File Upload and Download</h3>
    </abp-card-header>
    <abp-card-body>
        <abp-row>
            <abp-column>
                <h3>Upload File</h3>
                <hr />
                <form method="post" enctype="multipart/form-data">
                    <abp-input asp-for="UploadFileDto.Name"></abp-input>

                    <abp-input asp-for="UploadFileDto.File"></abp-input>

                    <input type="submit" class="btn btn-info" />
                </form>
            </abp-column>

            <abp-column style="border-left: 1px dotted gray">
                <h3>Download File</h3>
                <hr />
                <form id="DownloadFile">
                    <div class="form-group">
                        <label for="fileName">Filename</label><span> * </span>
                        <input type="text" id="fileName" name="fileName" class="form-control ">
                    </div>

                    <input type="submit" class="btn btn-info"/>
                </form>
            </abp-column>
        </abp-row>
    </abp-card-body>
</abp-card>
We divided the page vertically, left side will be using for upload and right side will be using for download. We use ABP Tag Helpers to create page.
index.js
$(function () {
  var DOWNLOAD_ENDPOINT = "/download";

  var downloadForm = $("form#DownloadFile");

  downloadForm.submit(function (event) {
    event.preventDefault();

    var fileName = $("#fileName").val().trim();

    var downloadWindow = window.open(
      DOWNLOAD_ENDPOINT + "/" + fileName,
      "_blank"
    );
    downloadWindow.focus();
  });

  $("#UploadFileDto_File").change(function () {
    var fileName = $(this)[0].files[0].name;

    $("#UploadFileDto_Name").val(fileName);
  });
});
This jQuery codes are using for download. Also we wrote a simple code to autofill Filename input when user selects a file.
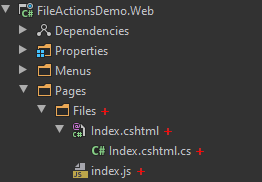
After creating razor page and js file, FileActionsDemo.Web project should be like as following image.
Result
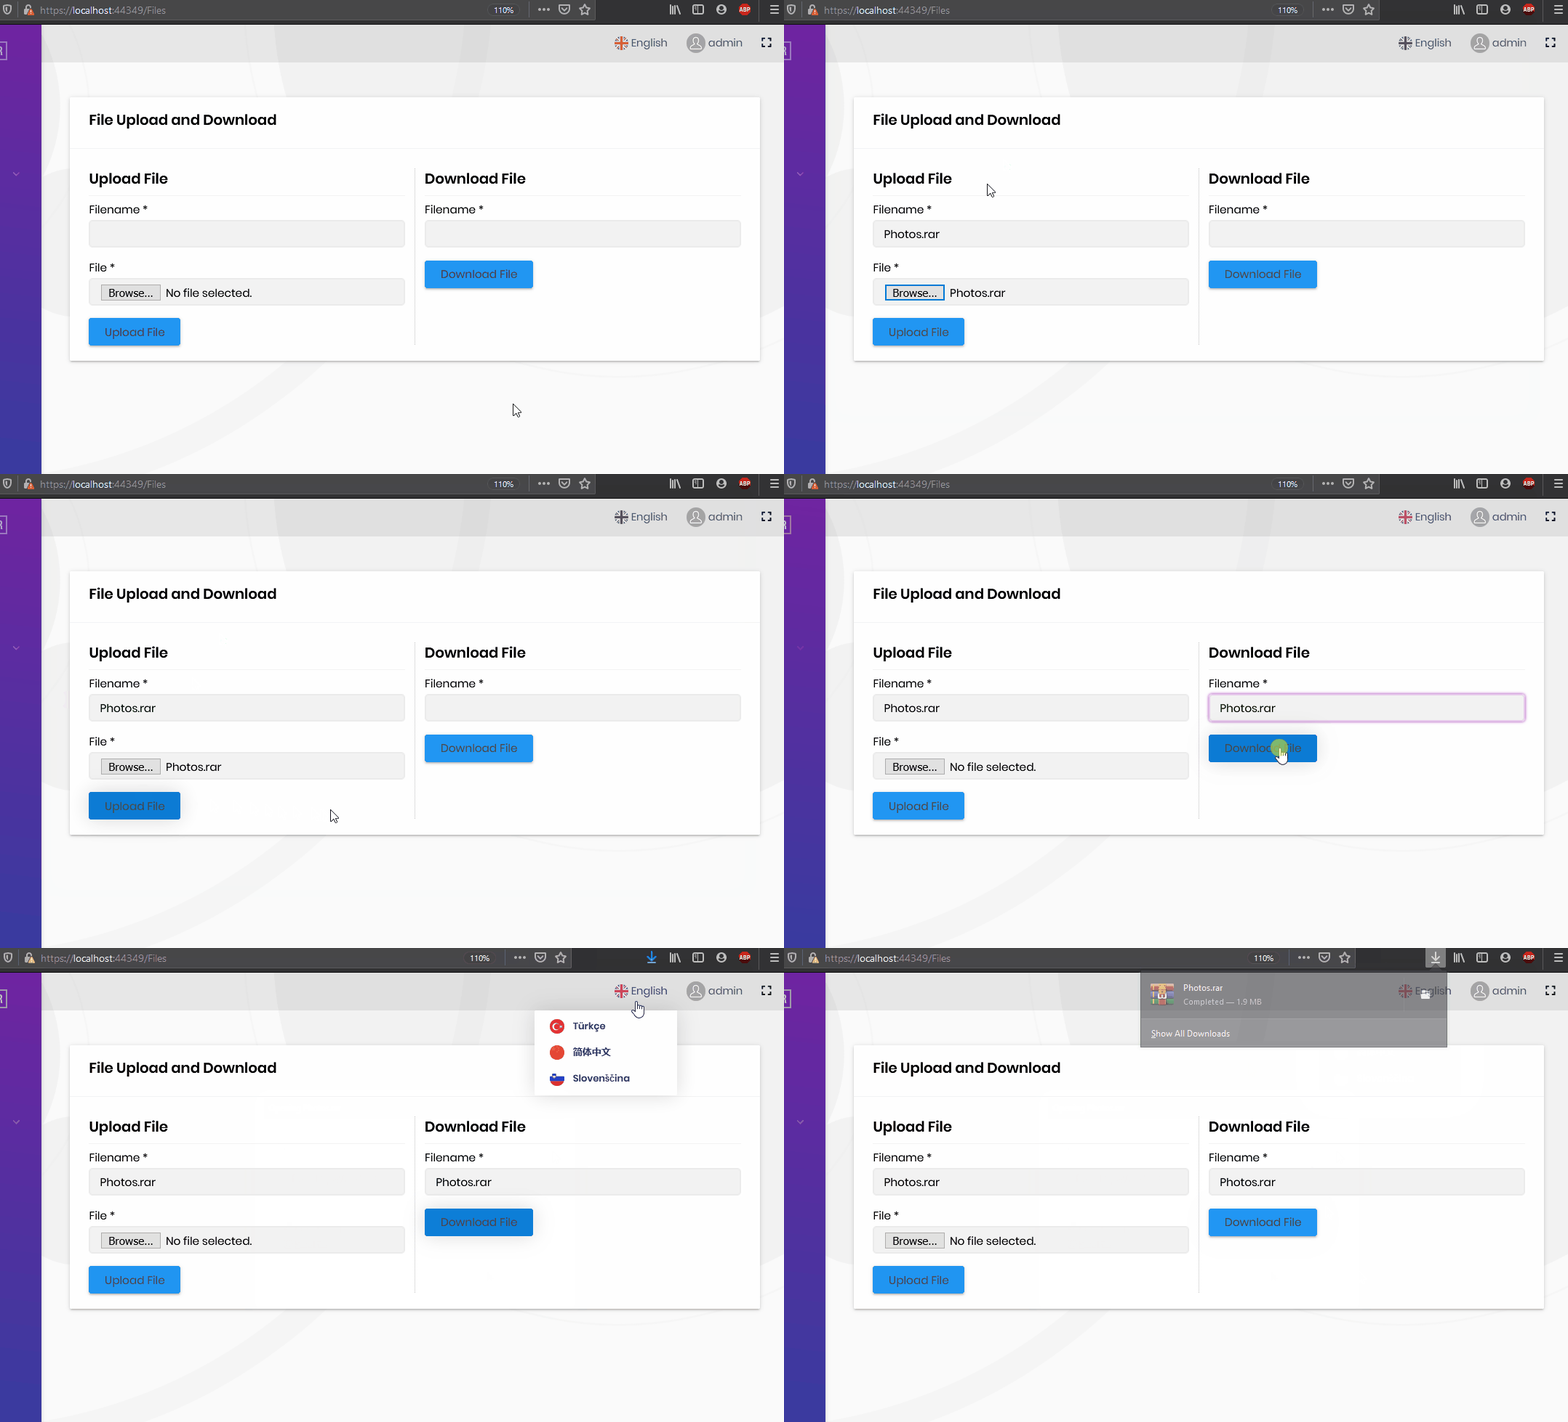
After completing code tutorial, run FileActionsDemo.Web project and go /Files. You can upload any file with any name and also download those uploaded files.
Thanks for reading. Please share your thoughts on this article in the comment section below.😊
alexandru-bagu 5 years ago
When you say large binary objects you don't actually mean large files, do you? I mean do try uploading a 1gb file with your code and see if it will actually work without any tweaks. How would one go about uploading a file directly to the API without using a Dto (because loading unnecessarily a 1gb file, heck it could be any size, in memory is stupid)? In AppService I could read the body stream, but how does one manage the authentication without digging through volosoft's code to figure out the parts required to build a httpclient with the required headers to be able to actually make the requests?
cotur 5 years ago
Hi Alexandru, This post is just PoC for file upload and download processes, I never described that it the best-practise. For really big files, of course we should use streaming, not byte arrays. ABP Framework has one special object to solve this issue, that is the RemoteStreamContent. With RemoteStreamContent, you are able to send streams from controller to application service and to blob provider. But you should not use Database Provider if you plan to store really big files, because Entity Framework have no stream implementation. Some resources for you: https://github.com/dotnet/efcore/issues/6234 https://github.com/abpframework/abp/issues/7418
Anthony_Albutt 5 years ago
Great article. How do you get _fileContainer.SaveAsync(input.Name, input.Content, true); to add TenamatId in the data record. The read requires it by default. where to add container.IsMultiTenant = true;
cotur 5 years ago
Thanks for thoughts. :) The multi-tenacy is automatically managed by blob providers. You should not care about it.
Anthony_Albutt 5 years ago
Thanks Cotur. Unfortunately, when the record is saved into the data table using your example, no TenantId is inserted. If you read, no data is returned, unless I manually update the data record and add the correct TenantId into the data table
cotur 5 years ago
Oh I see, this is a known problem and in 3.1 version of ABP (currently is under development) we had fix that issue. You need to work with source-code for now, when the new version is released (probably in 4-5 days) you'll get that bug-fix. reference: https://github.com/abpframework/abp/pull/4944
hikalkan 5 years ago
Great article :)